Execution Scenario
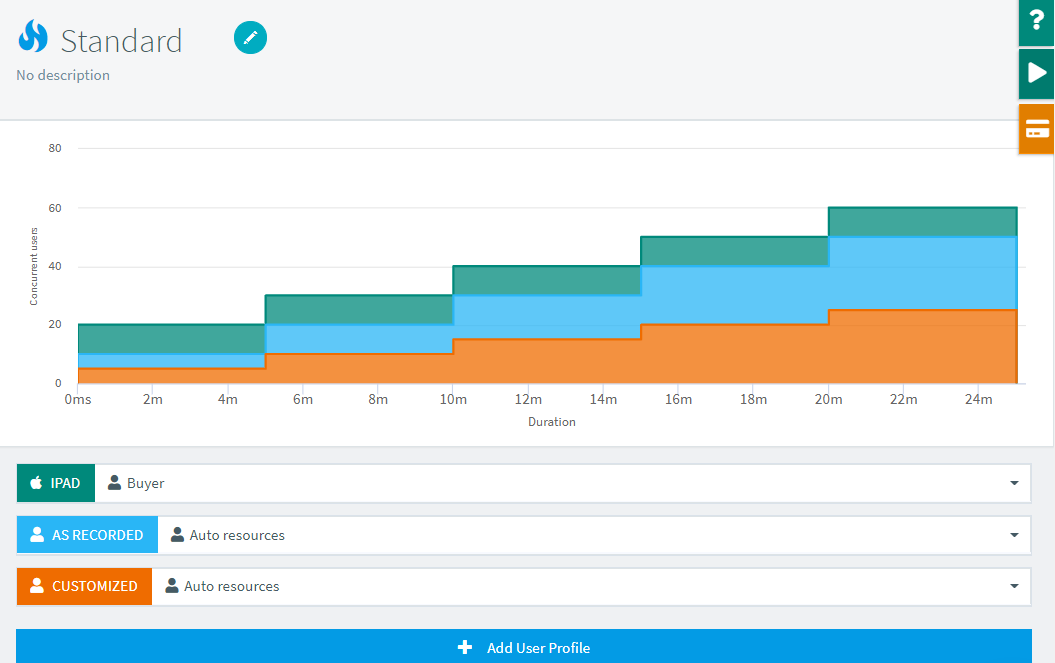
A scenario is a collection of user profiles with settings for each. This section explains in depth how to configure and launch a scenario.

Scenarios allow you to easily compose a test with virtual users having:
- Different behavior,
- Different test locations (cloud and on premise),
- Expected network conditions (like 3G or DSL).
Introduction
A scenario can contain one or more user profiles (aka userloads), each of them having their own settings. The maximum number of profiles is defined by your subscription plan.
You can run multiple Virtual Users, using different configurations (geographical locations, user agents, bandwidth, etc.) at the same time by adding them to your scenario.
Userload
Add a Userload
You can use either of the following procedures to how to add a user execution profile to your scenario:
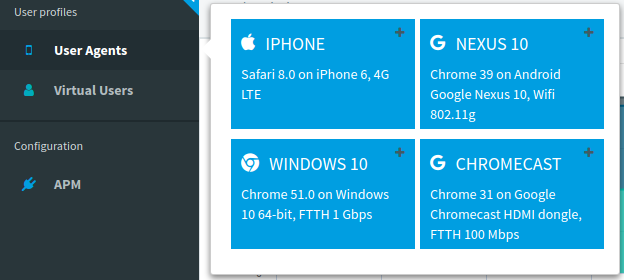
- Hover the User Agents menu or the Virtual Users menu in the left sidebar,
- Drag'n drop the wanted profile under the scenario in the gray box.
OR
- Click the large
+ buttonat the bottom of the screen.

There are several predefined user profiles available from the left menu.
The first User Agents gives you access to user profiles configured to use specific devices user agents and bandwidth:
- Mobile,
- Tablet,
- Desktop users,
- and even Smart TVs.

These profiles allow you to start simulating specific user agents very quickly. But, you can also define your own settings by editing the virtual user profile.
The second menu Virtual Users contains User Profiles pre-configured to run a specific Virtual User.
Tip
You can also add a default "As recorded" user profile by clicking on the big + button bellow the list of profiles.
Select Userload
To select a Virtual User profile (a userload), simply click on it. A blue border appears on the selection:

You can use the following keyboard shortcuts to interact with the selection:
| Shortcut | Button | Description |
|---|---|---|
| del |  |
Removes the selected profile. |
| ↑ | Selects the previous profile. | |
| ↓ | Selects the next profile. | |
| ctrl + ↑ |  |
Moves the selected profile up. |
| ctrl + ↓ |  |
Moves the selected profile down. |
The buttons are visible when you place your mouse hover a userload, on its top right corner.
Note
The 'Shift+?' shortcut shows / hides a list of available shortcuts.
Duplicate a Userload

The following procedure explains how to duplicate a user profile in your scenario:
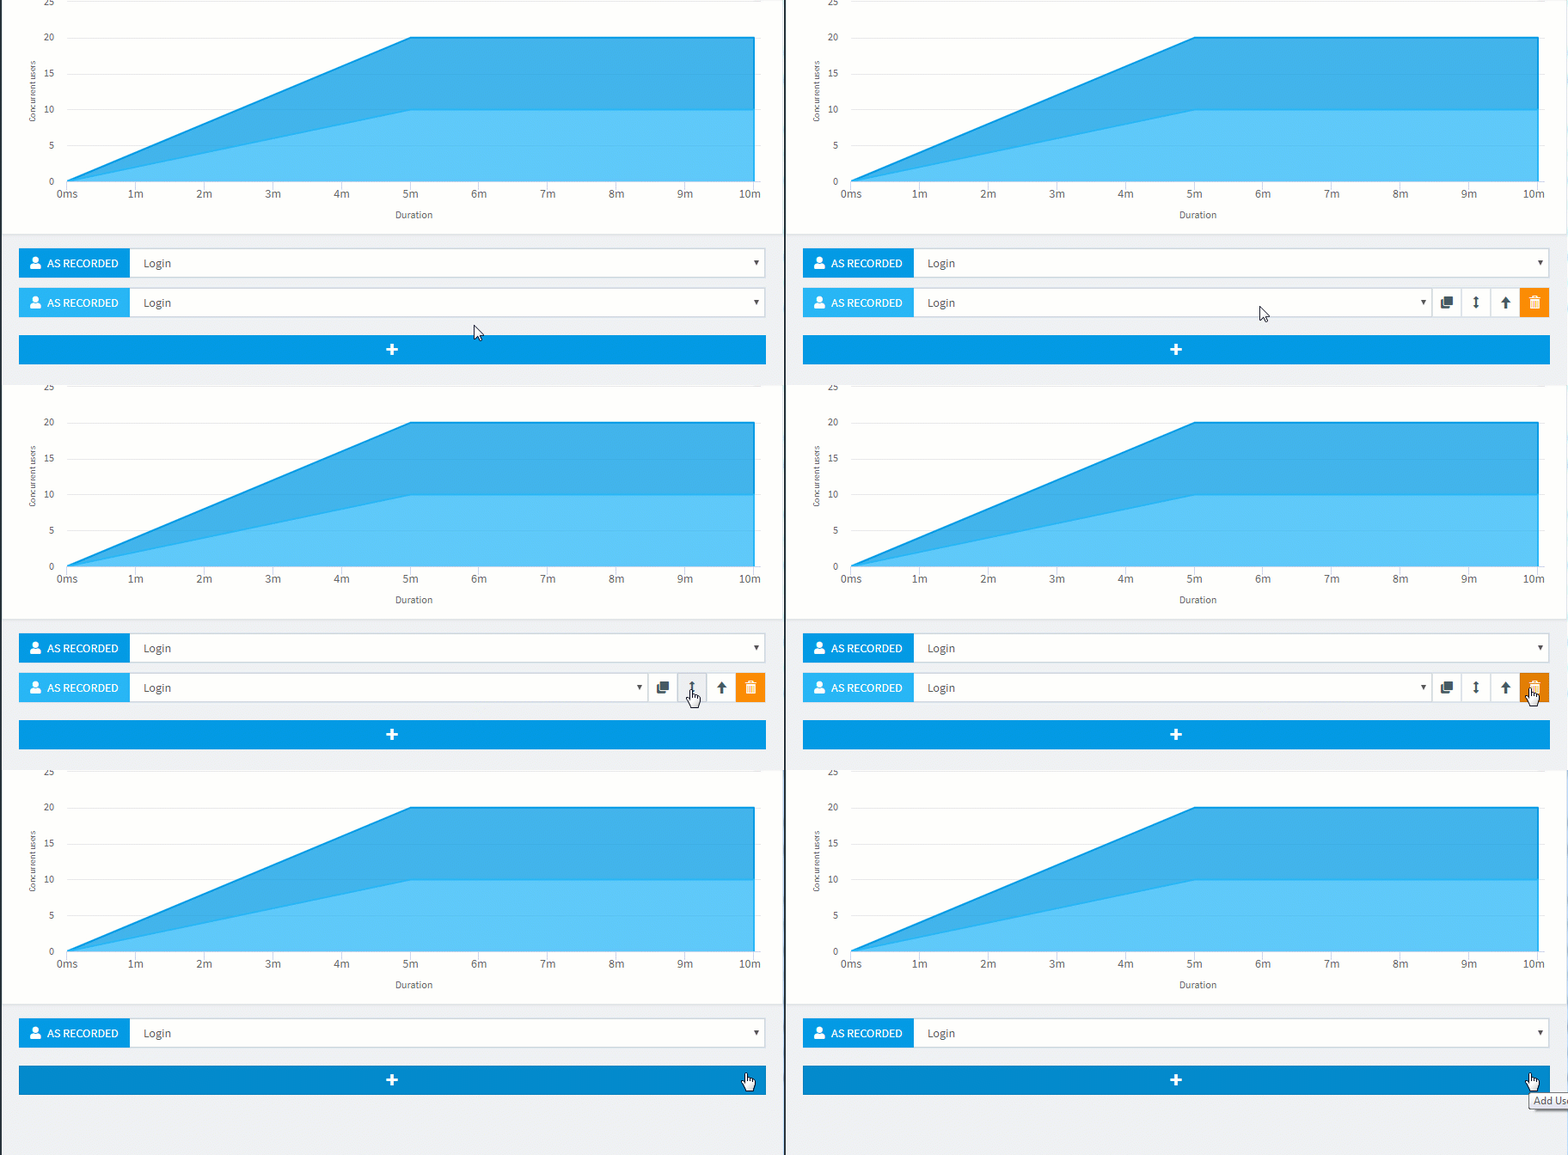
- Hover an existing user profile, below the scenario chart,
- The Duplicate button
 appears,
 - Click on it,
- A new identical user profile is inserted.
Rename a Userload
It is possible to change the user profile name:

This way you can have your own customized names inside the report instead of the default value, Region name - Virtual user name:

Note
Try to keep the names short, otherwise they may not display well in some report items.
Remove a Userload

To remove a userload from your scenario:
- Place your mouse over the userload you want to remove,
- Click on the Delete button appearing in the right top corner.

Custom Settings

Let's see the virtual user profile settings one by one:
| Setting | Description | Example |
|---|---|---|
| Strategy | Lets you define user load strategy (number of concurrent users and duration). | 1000 vus, 1h |
| VU | Defines the virtual user profile attached to this userload. | Buyer |
| Location | Geo location where the virtual users are running. It can be a Cloud or On-Premise location. | EU West (Ireland) |
| Device | Defines the virtual user's browser settings (like cookies and cache management) and the network simulation settings. | As Recorded |
| DNS | Domain Name System settings. | Clear cache OFF |
| JMeter | JMeter runtime properties and JMeter Test Logs file generation settings. | OFF |
| Memory | Memory override settings. | default |
The following sections are describing the sub-settings for each of the setting above.
Apply all
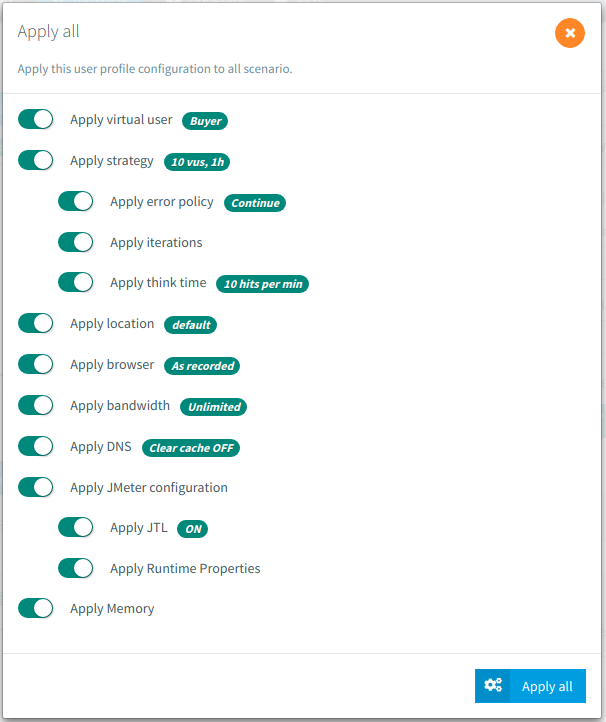
The Apply All button  lets you apply one or more custom settings of a user profile to the whole scenario. For example you may want all your user execution profiles to have the same duration.

The following procedure explains how to apply all settings of a user profile to your scenario:
- Hover an existing user profile, below the scenario chart,
- The Apply All button
 appears,
 - Click on it,
- The properties selection dialog appears,
- Select which properties you want to apply to other user profiles,
- Click on the blue Apply All button at the bottom of the dialog box.
All the user profiles of your scenario now shared the same configuration.
WebDriver UserLoad

Real-browser simulation consumes a lot more resources than regular JMeter load tests and when several are executed in parallel the response times may be inaccurate. Since real browsers execute a lot of scripts (usually in JavaScript) and are not meant to be run in parallel they will often compete for available CPU thus increasing scripts execution times.
That is why Webdriver virtual users have their number of concurrent users limited to 1.
Rescale entire test
When you have setup a complex load policy with a combination of various load profiles it can be time consuming to edit them all one by one if you want to increase the overall number of users or duration.
That's why you can use the Rescale Scenario button instead:

Just enter the new number of concurrent users and duration you would like to launch and we will increase the proportions of each User profile to match this.